


Mastering the Art of Wireless Microphones: Elevate Your Video Content Creation
In the world of video content creation, audio plays a huge role in engaging and captivating your audience. Some would argue that audio is more important than the visuals. A key tool in achieving top-notch audio is the wireless microphone. Whether you're a vlogger, filmmaker, marketing specialist, videography, digital content manager or content creator, understanding how to properly use wireless microphones can make your video go from good to great. Let’s dive into the fundamentals of using wireless microphones and highlight the numerous benefits they bring to your video content.
The Basics of Wireless Microphone Usage:
- Choose the Right Microphone: Make sure your microphone suits your specific needs. Lavalier (lapel) microphones are perfect for interviews and on-the-go situations, while shotgun microphones are good at capturing audio from a distance. Research different models and read reviews to ensure you find the perfect fit for your content style. These are my go-to lav mics.
- Frequency Selection: Interference can be a significant issue with wireless microphones. Selecting an appropriate frequency band that's less congested will minimize the chances of interference and dropout. Always consult the manufacturer's guidelines for recommended frequency settings in your area.
- Pairing and Syncing: Most wireless microphone systems require pairing and syncing between the transmitter and receiver. Follow the manufacturer's instructions closely to establish a reliable connection. Make sure both devices are on the same frequency and use fresh batteries to prevent unexpected disruptions.
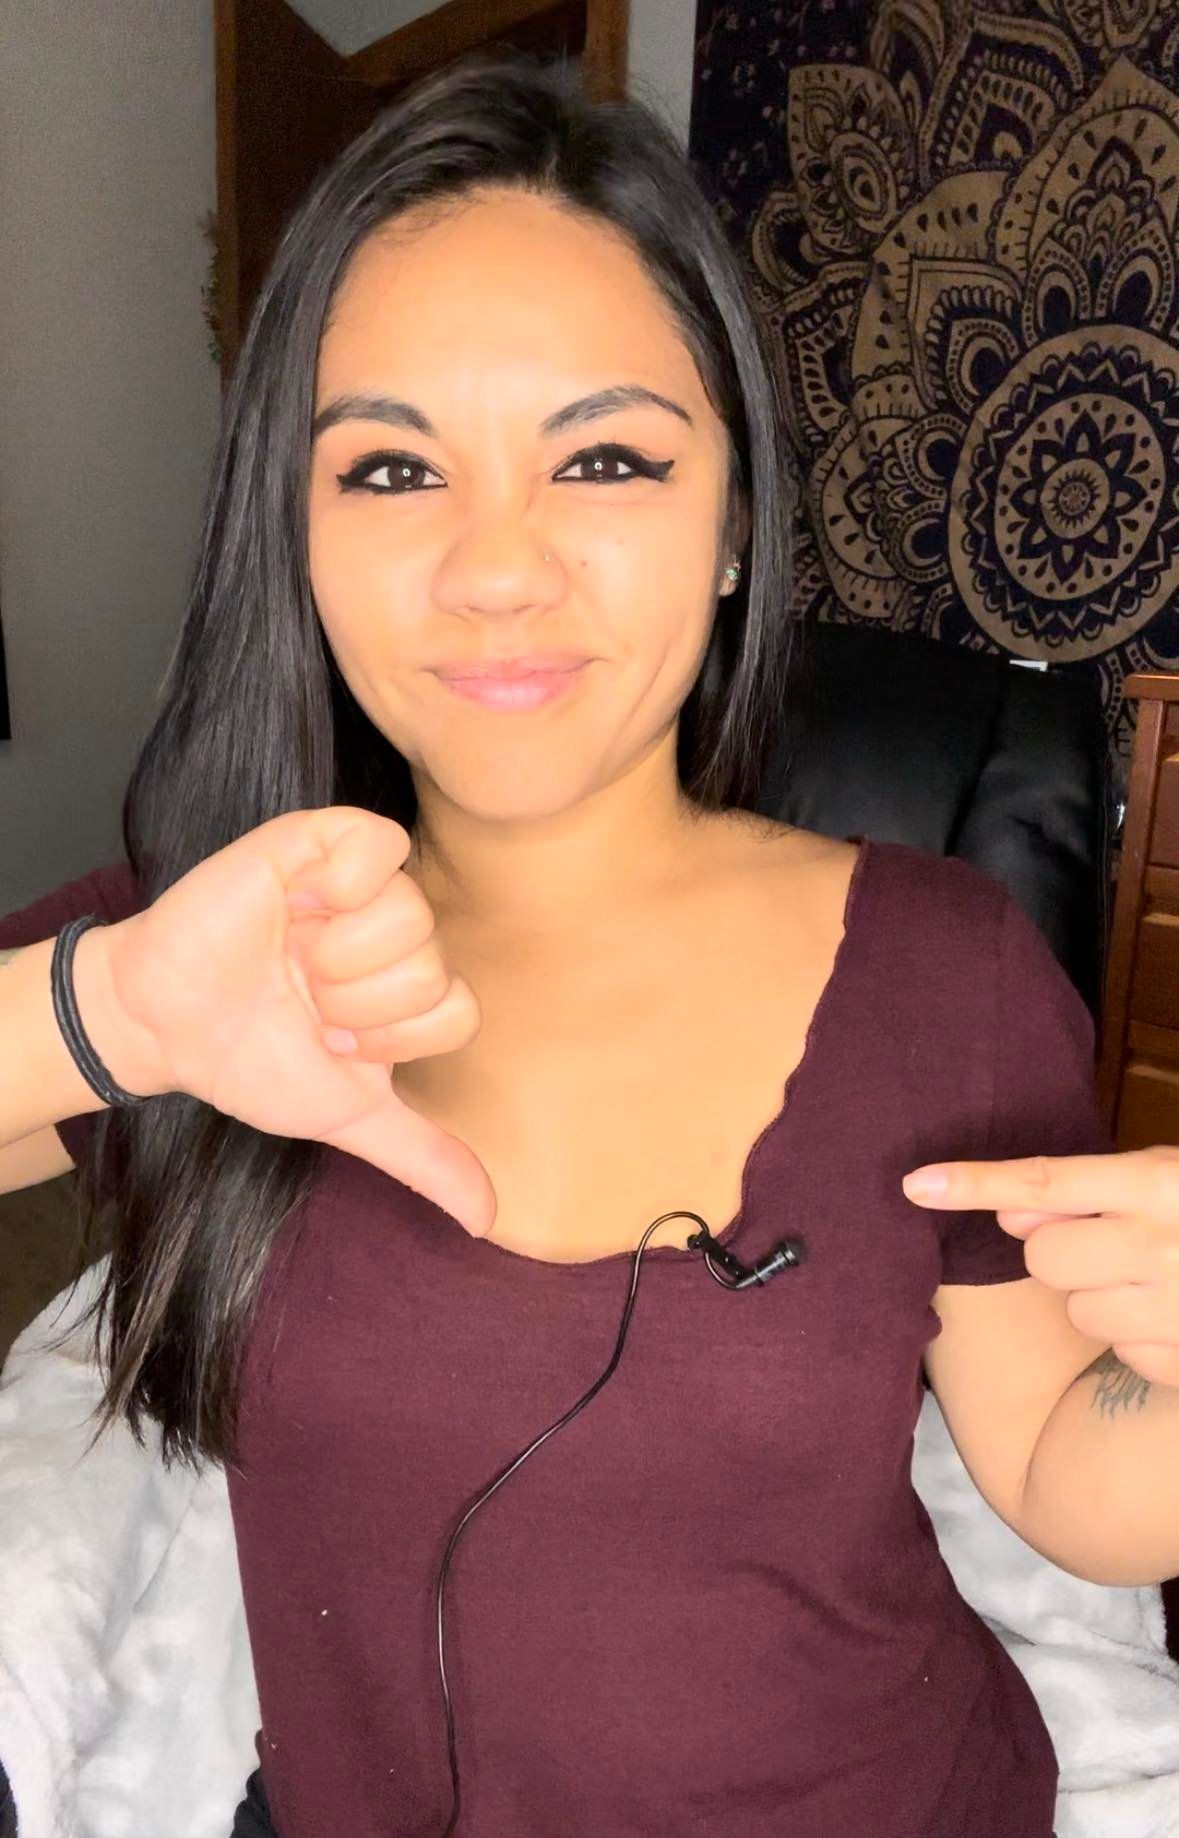
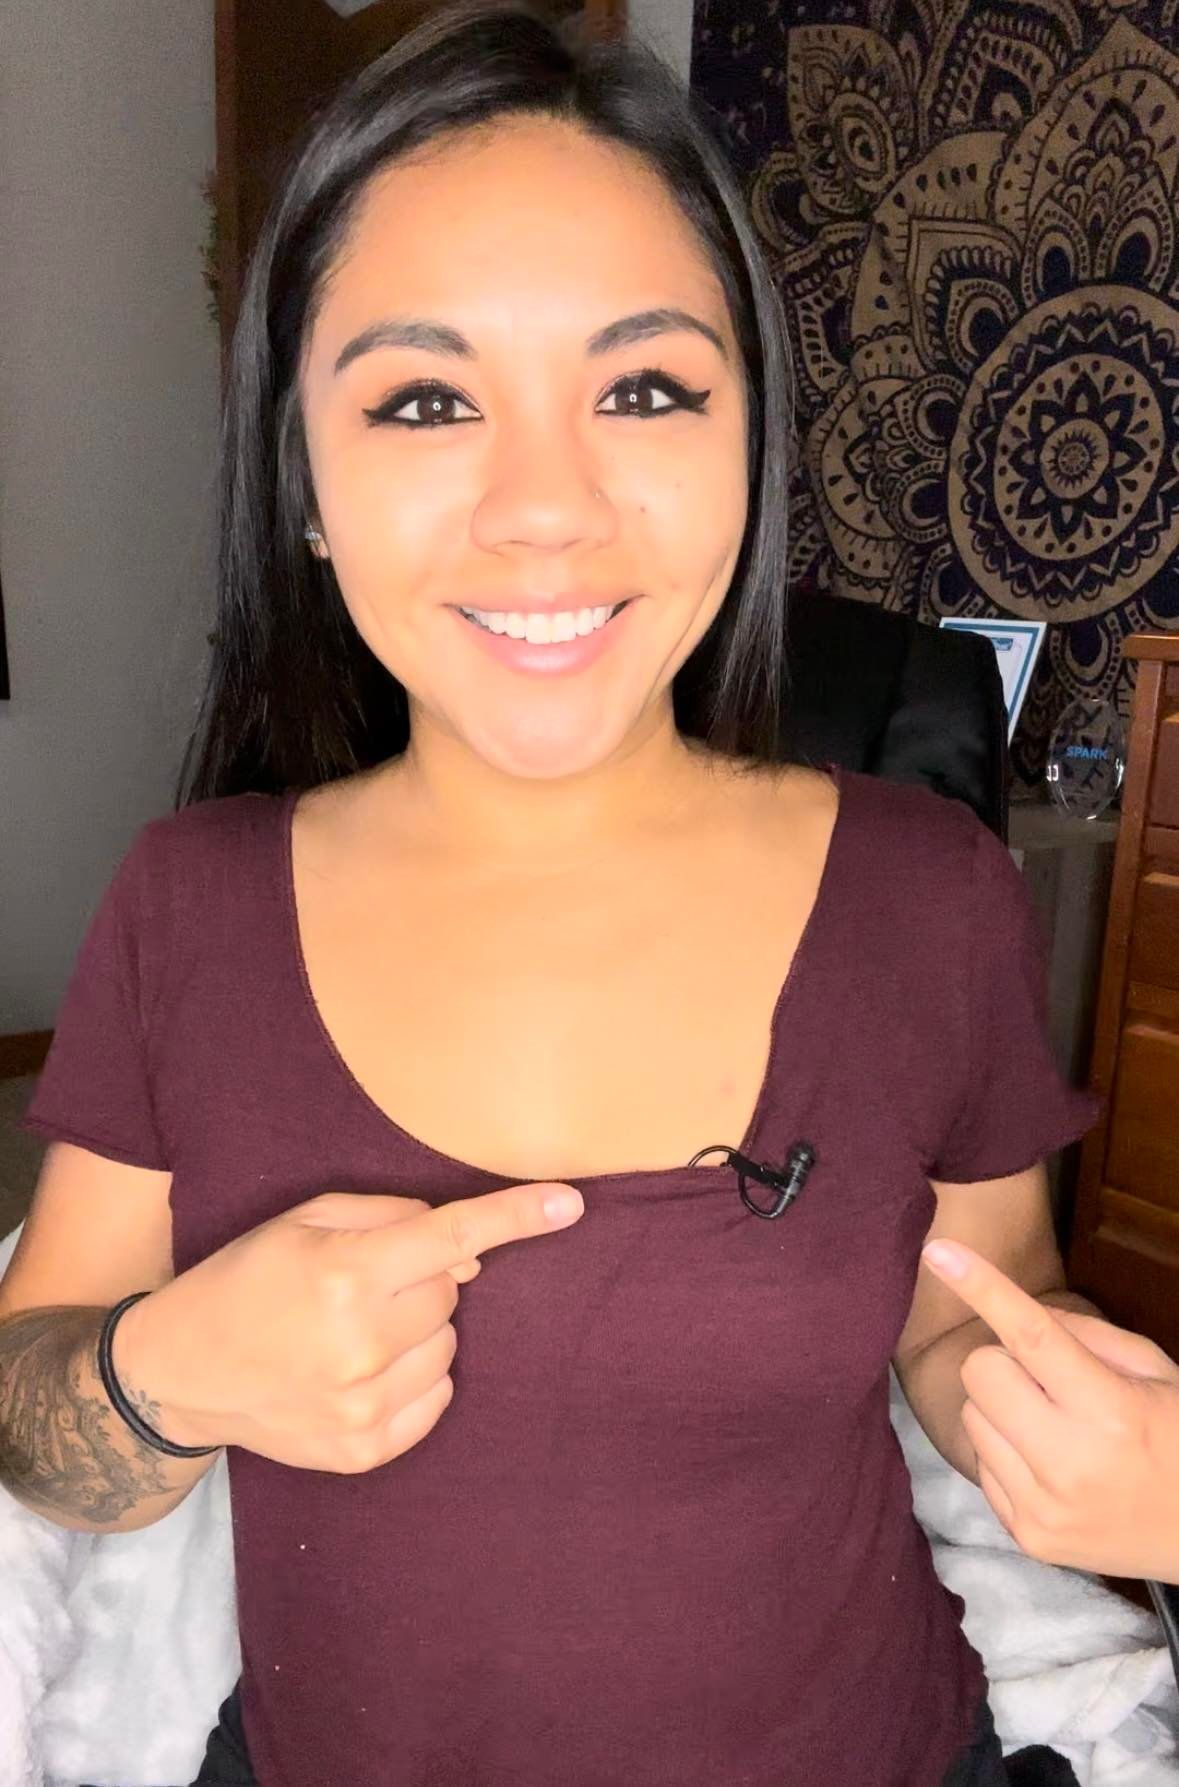
- Placement and Positioning: Proper microphone placement is crucial for capturing clear and natural audio. Position lavalier microphones near the speaker's mouth but hidden from view, while shotgun microphones should be pointed towards the sound source for optimal audio pickup. If you’re using a lav mic, have your interviewee thread the cord under their shirt and attach the microphone part at the top of their shirt. Make sure the microphone is sitting on the outside of their shirt. I’ve seen too many people just clip the mic to the person’s shirt without hiding the cord and it looks sloppy and distracting. (See images below)
Benefits of Using Wireless Microphones for Video Content Creation:
- Enhanced Audio Quality: Wireless microphones offer superior audio quality compared to built-in camera microphones. They capture crisp and clear sound directly from the source, minimizing ambient noise and ensuring your message comes across loud and clear.
- Freedom of Movement: Wireless microphones free you from the constraints of wired setups, allowing you to move around freely while recording. This flexibility is particularly beneficial for dynamic shots, interviews, and outdoor shoots.
- Professionalism: High-quality audio is a hallmark of professional video content. By using wireless microphones, you convey a sense of professionalism and dedication to your audience, making your videos more engaging and enjoyable.
- Reduced Post-Production Work: Capturing clean audio during the recording phase reduces the need for extensive post-production audio editing. This saves you time and effort, enabling you to focus on other creative aspects of your content.
- Versatility: Wireless microphones can adapt to various shooting scenarios, making them versatile tools for content creators. Whether you're shooting indoors, outdoors, in noisy environments, or with multiple speakers, wireless microphones can handle it all.
Audio quality is a critical component that can make or break your videos. Wireless microphones offer an array of benefits, from improved audio quality to enhanced flexibility, professionalism, and reduced post-production workload. By mastering the art of wireless microphone usage, you can elevate your content and captivate your audience with engaging, crystal-clear audio. So, invest in a reliable wireless microphone system, learn the proper techniques, and take your video content creation to new heights. Your viewers' ears will thank you!
Check out this video on YouTube to see a demonstration of how to properly place a microphone, an explanation of how the mics work and a more in-depth explanation of the mics themselves!


 Certified badge, blue, green, black, and white, with 2026 date")